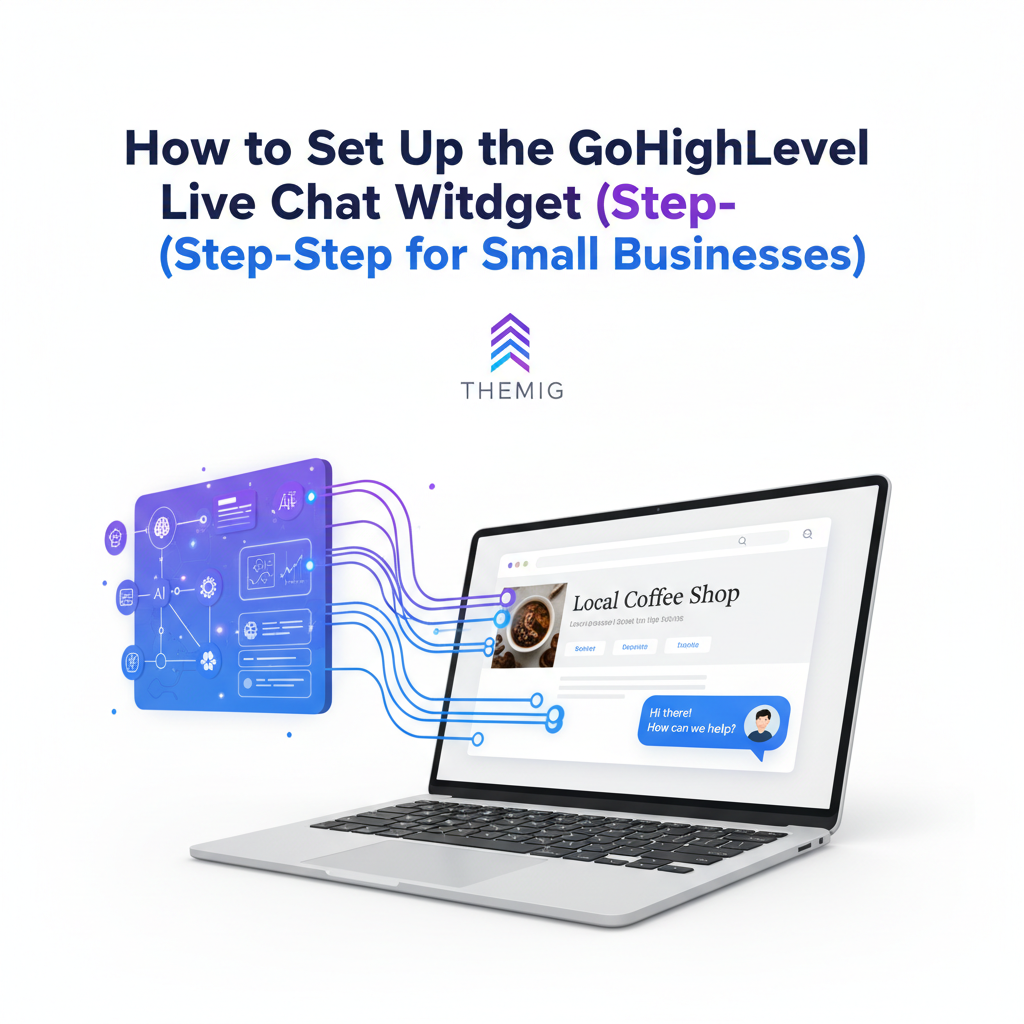
How to Set Up the GoHighLevel Live Chat Widget (Step-by-Step for Small Businesses)
Live chat is one of the fastest ways to turn anonymous visitors into real conversations and customers. If you use GoHighLevel, its built-in live chat widget lets you capture leads, reply in real time, and trigger powerful automations without bolting on extra tools.
This guide walks you step by step through creating, installing, and optimizing the GoHighLevel live chat widget, with practical tips tailored to small and medium businesses.
Why the GoHighLevel Live Chat Widget Matters
- Capture more leads: Turn casual visitors into contacts as soon as they ask a question.
- Centralize conversations: Every chat is stored inside Conversations in GoHighLevel, right next to SMS, email, and social DMs.
- Trigger automations: Use workflows to send follow-ups, create tasks, or move deals through your pipeline based on chat activity.
- Support across devices: The widget works on desktop and mobile so visitors can reach you from anywhere.
Before You Start: What You Need
- An active GoHighLevel sub-account with access to Sites and Automations.
- Access to your website or funnel (GoHighLevel sites, WordPress, Shopify, or another platform).
- A clear owner (or team) responsible for replying to incoming chats.
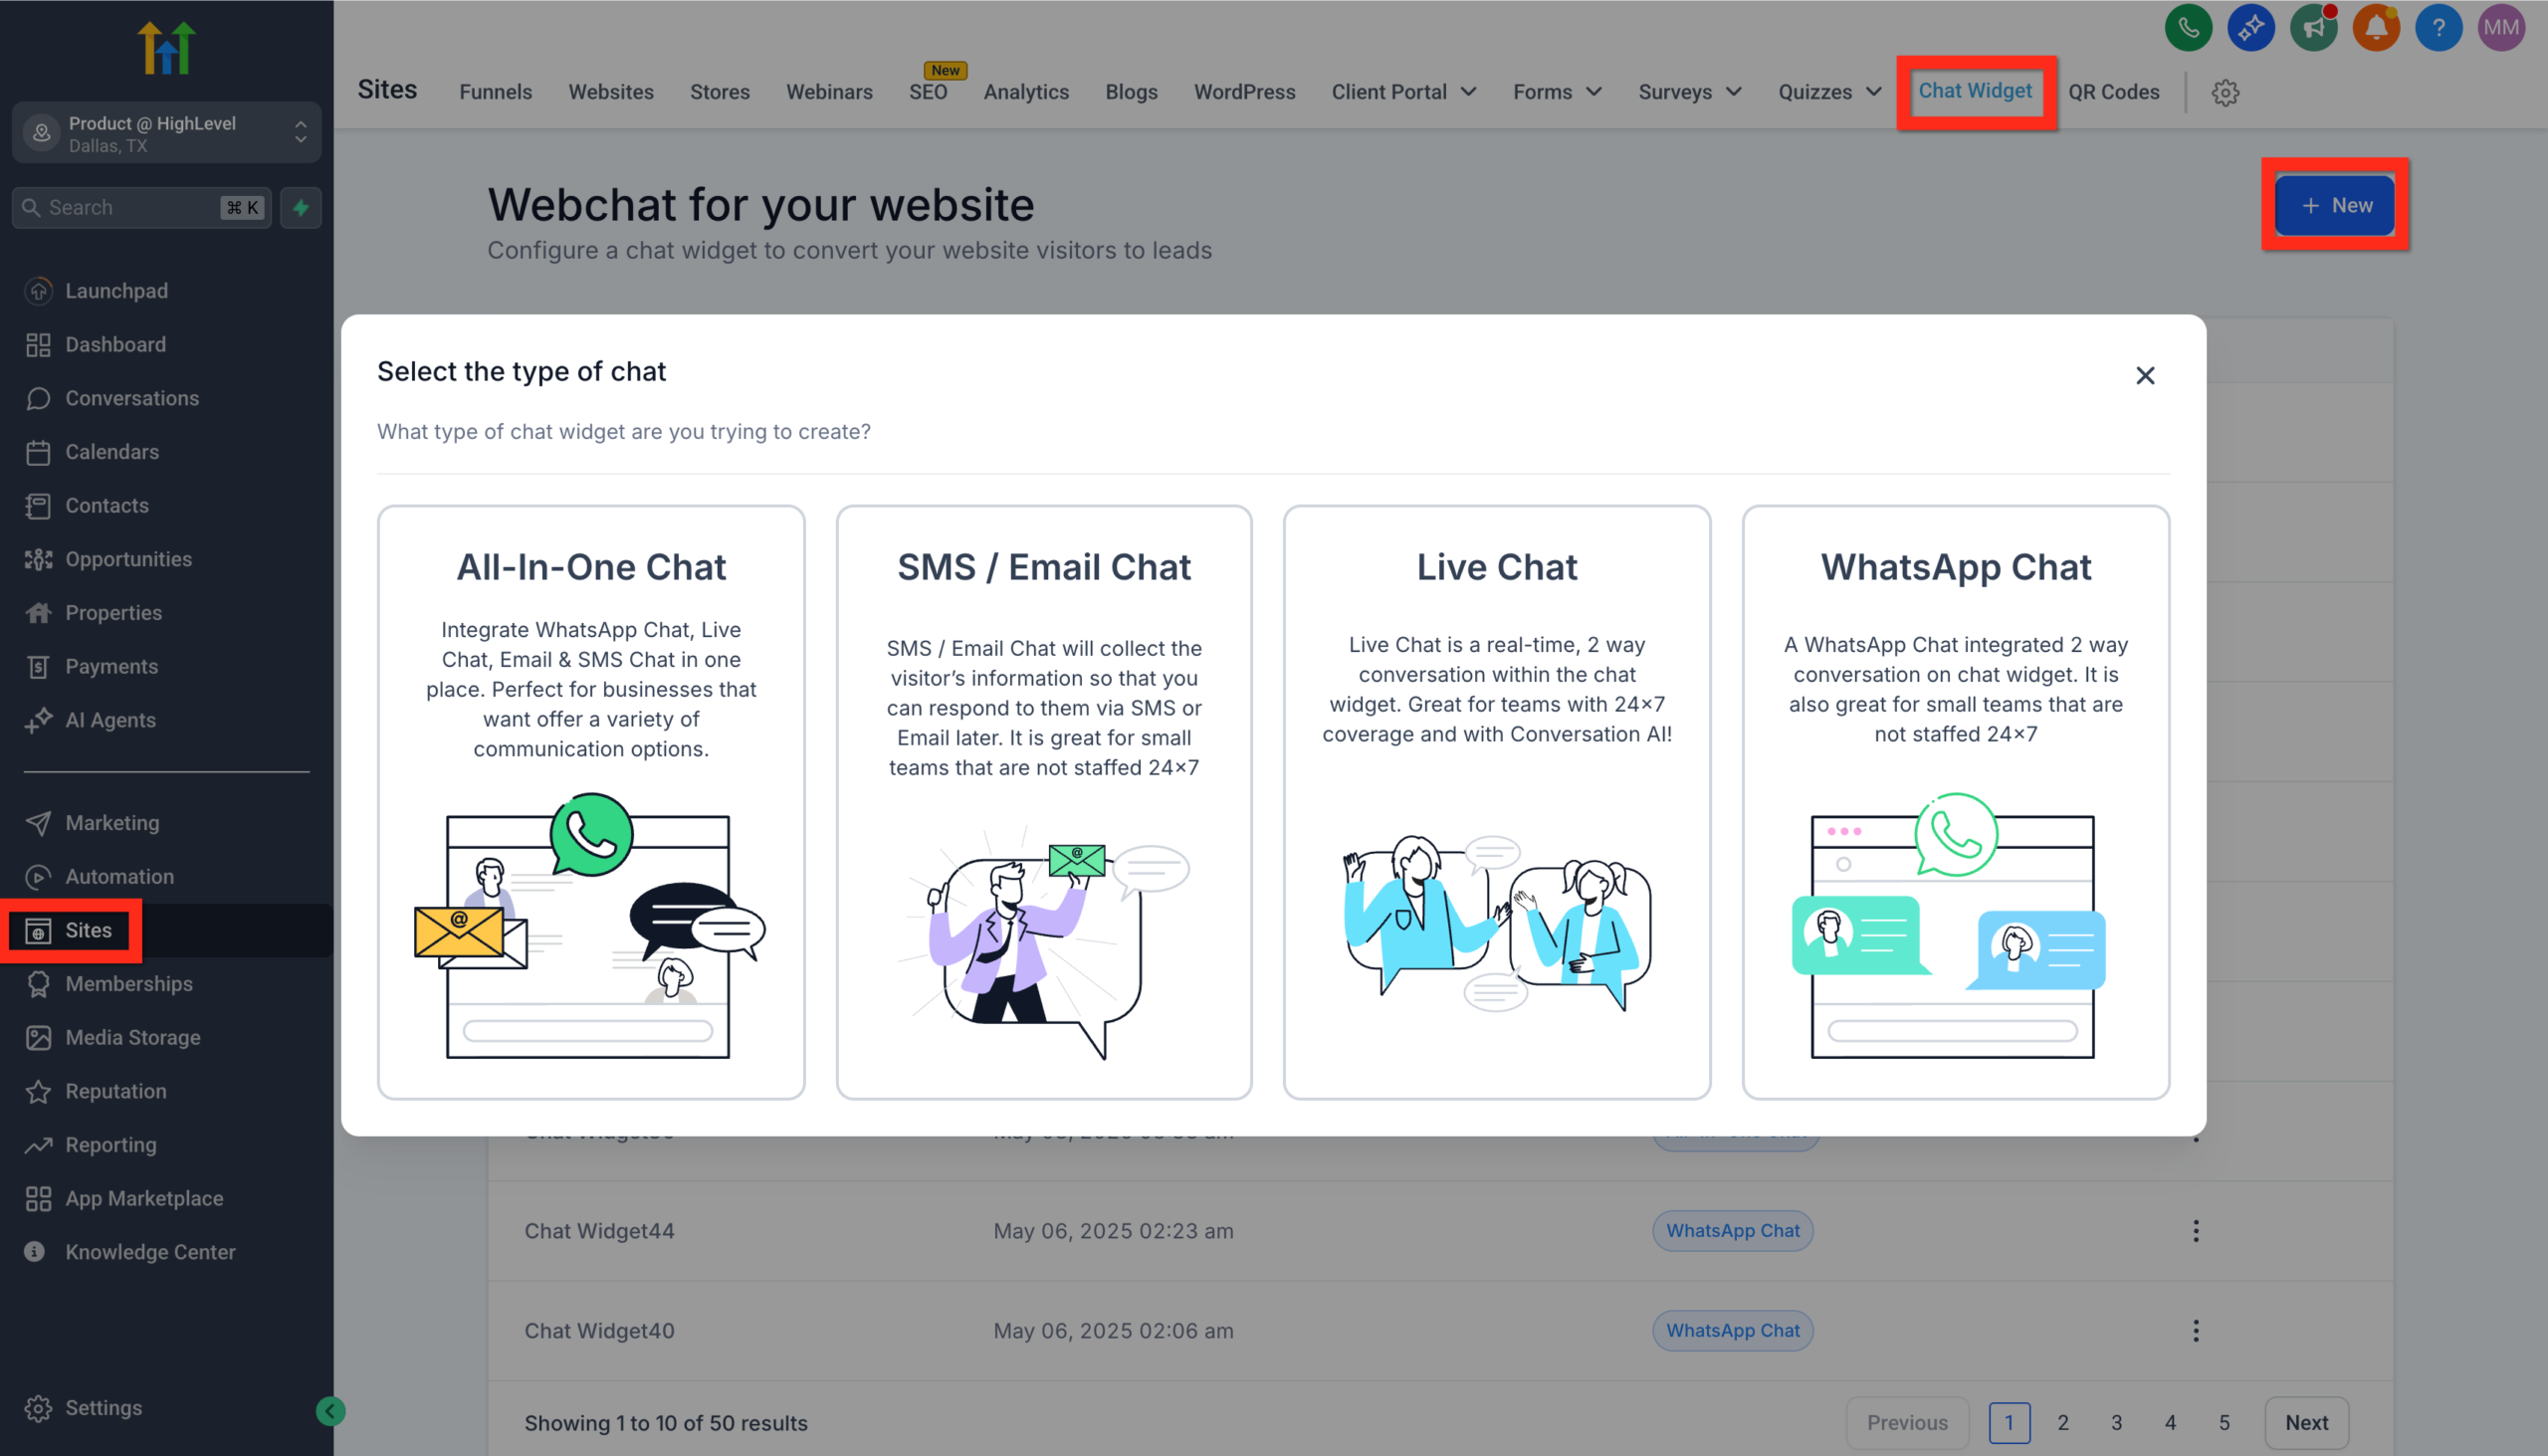
Step 1: Create Your GoHighLevel Live Chat Widget
- Log in to GoHighLevel and switch into the correct sub-account.
- Go to Sites > Chat Widget.
- Click New and choose Live Chat.
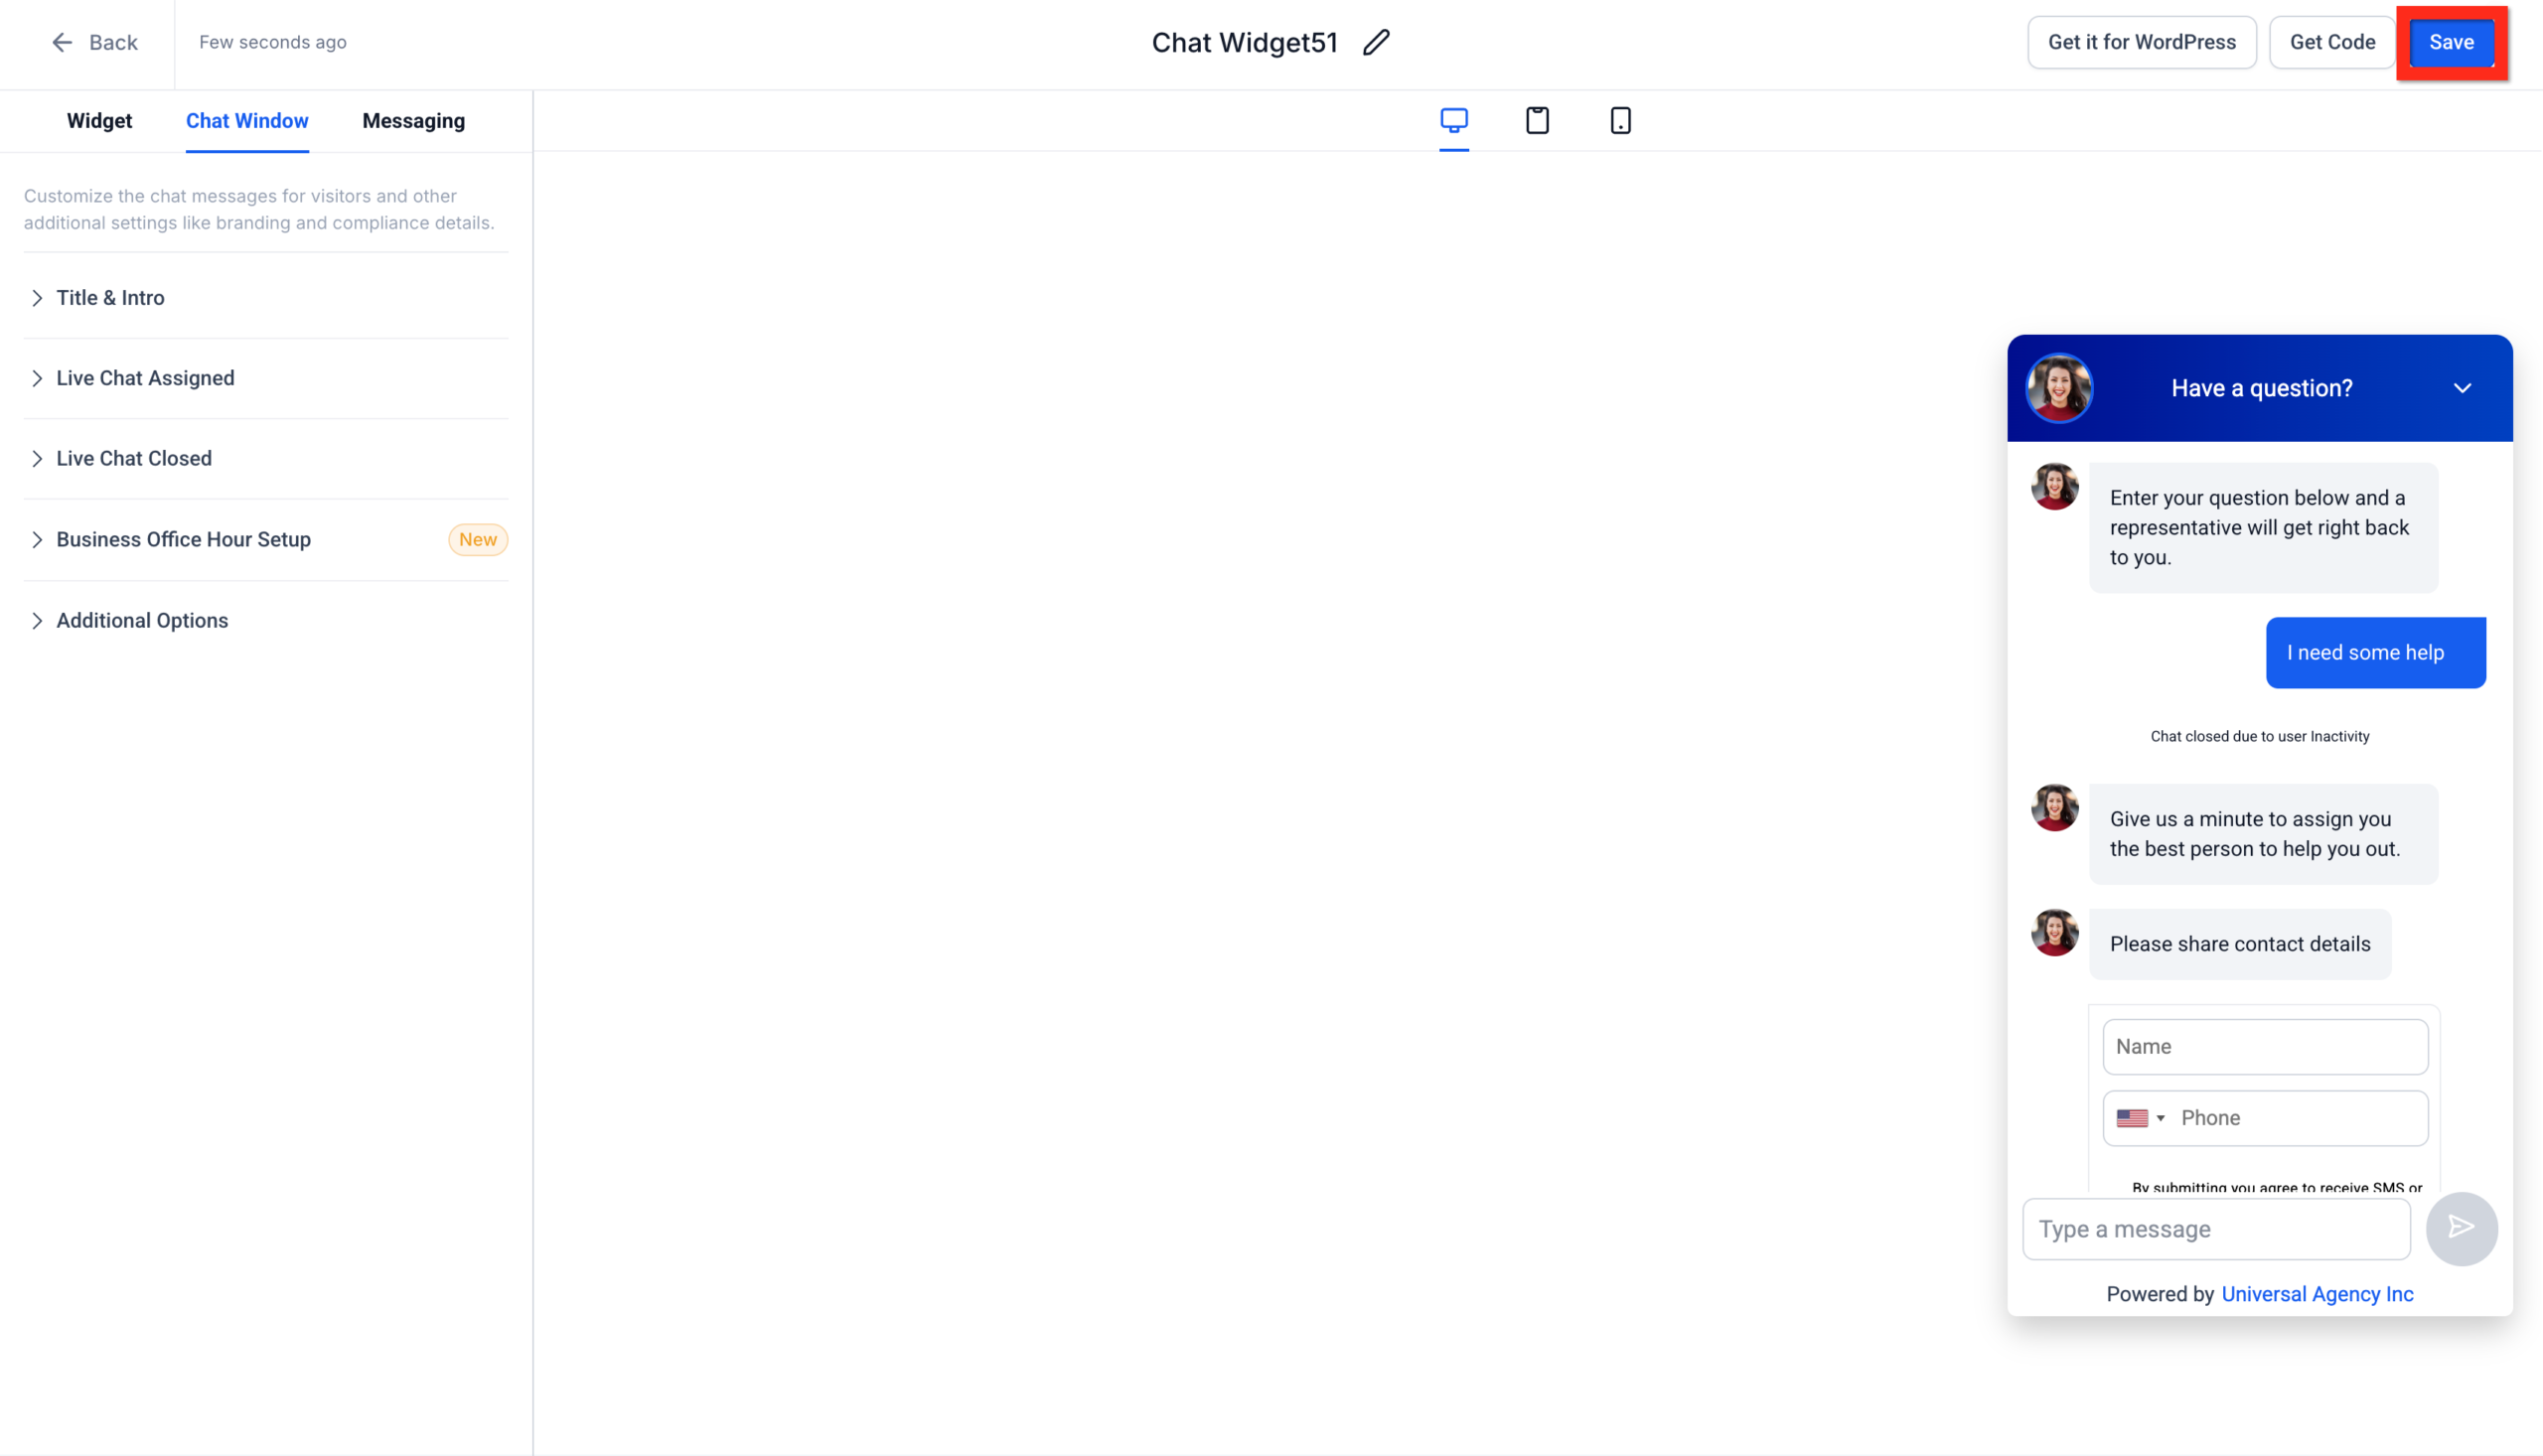
- Customize the widget so it matches your brand colours, logo, and tone (welcome message, position on screen, avatar, etc.).
- Click Save to create the widget.
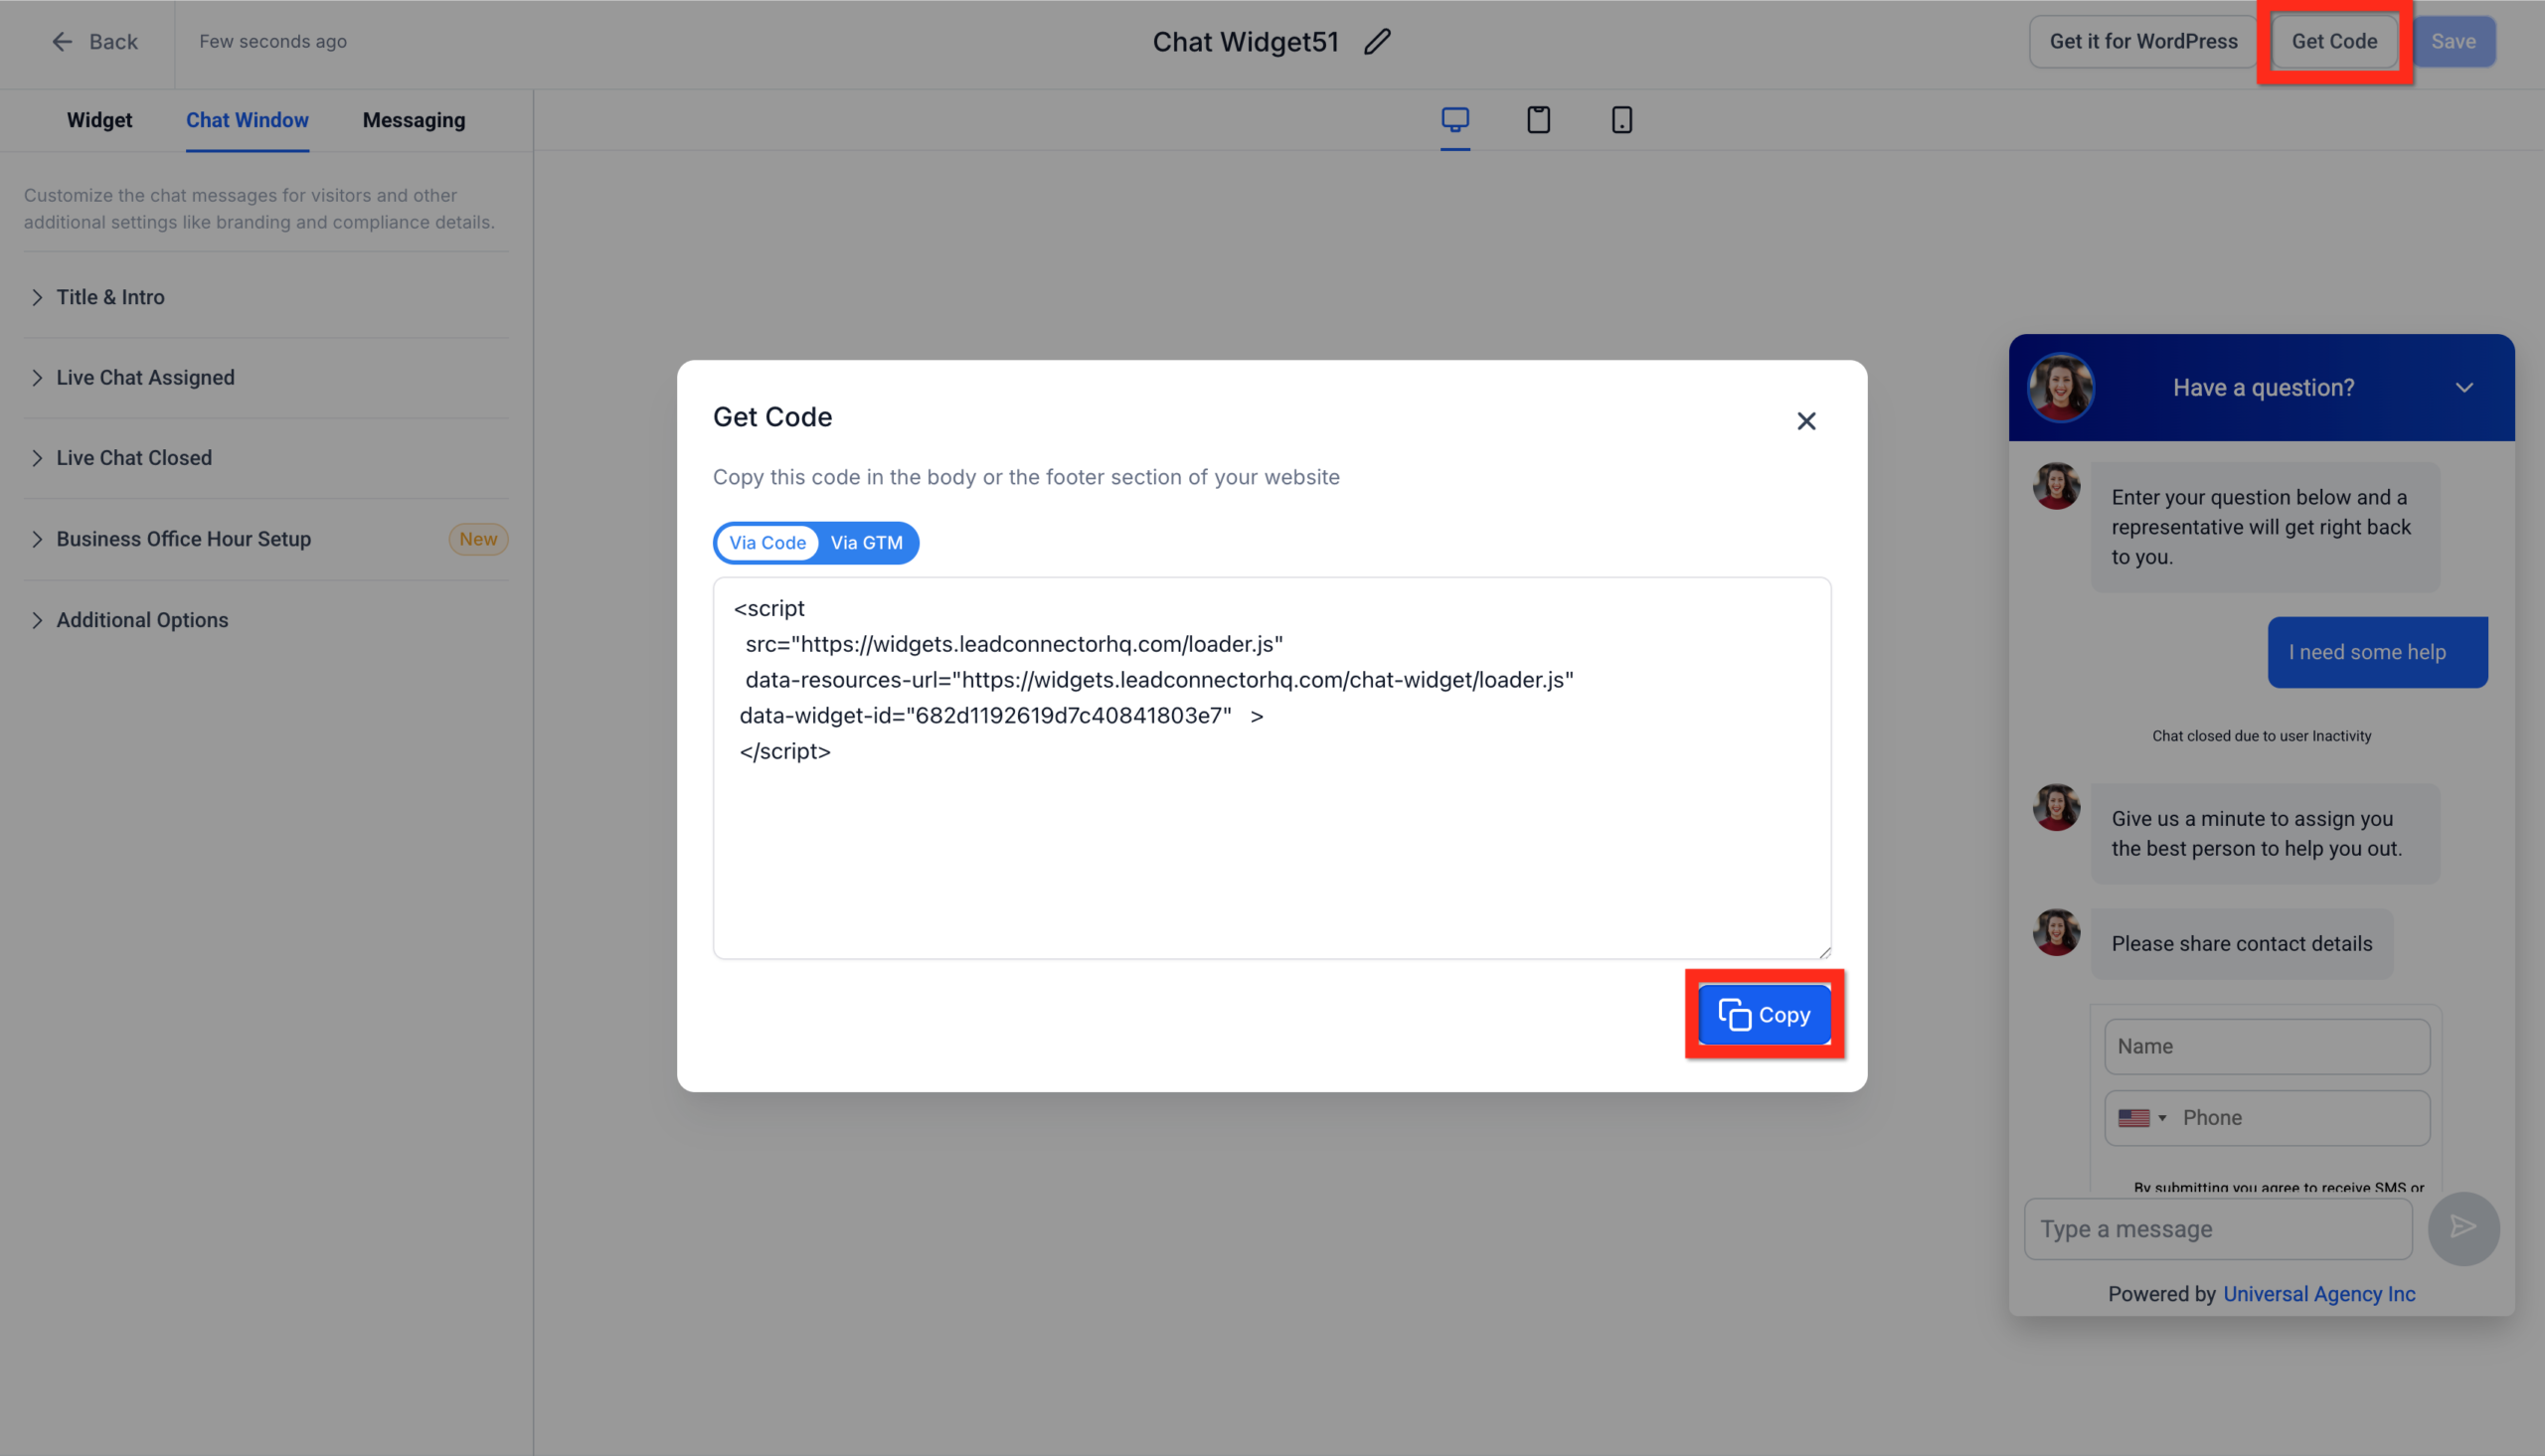
- Click Get Code and then Copy to grab the embed script. You will paste this into your website in the next step.
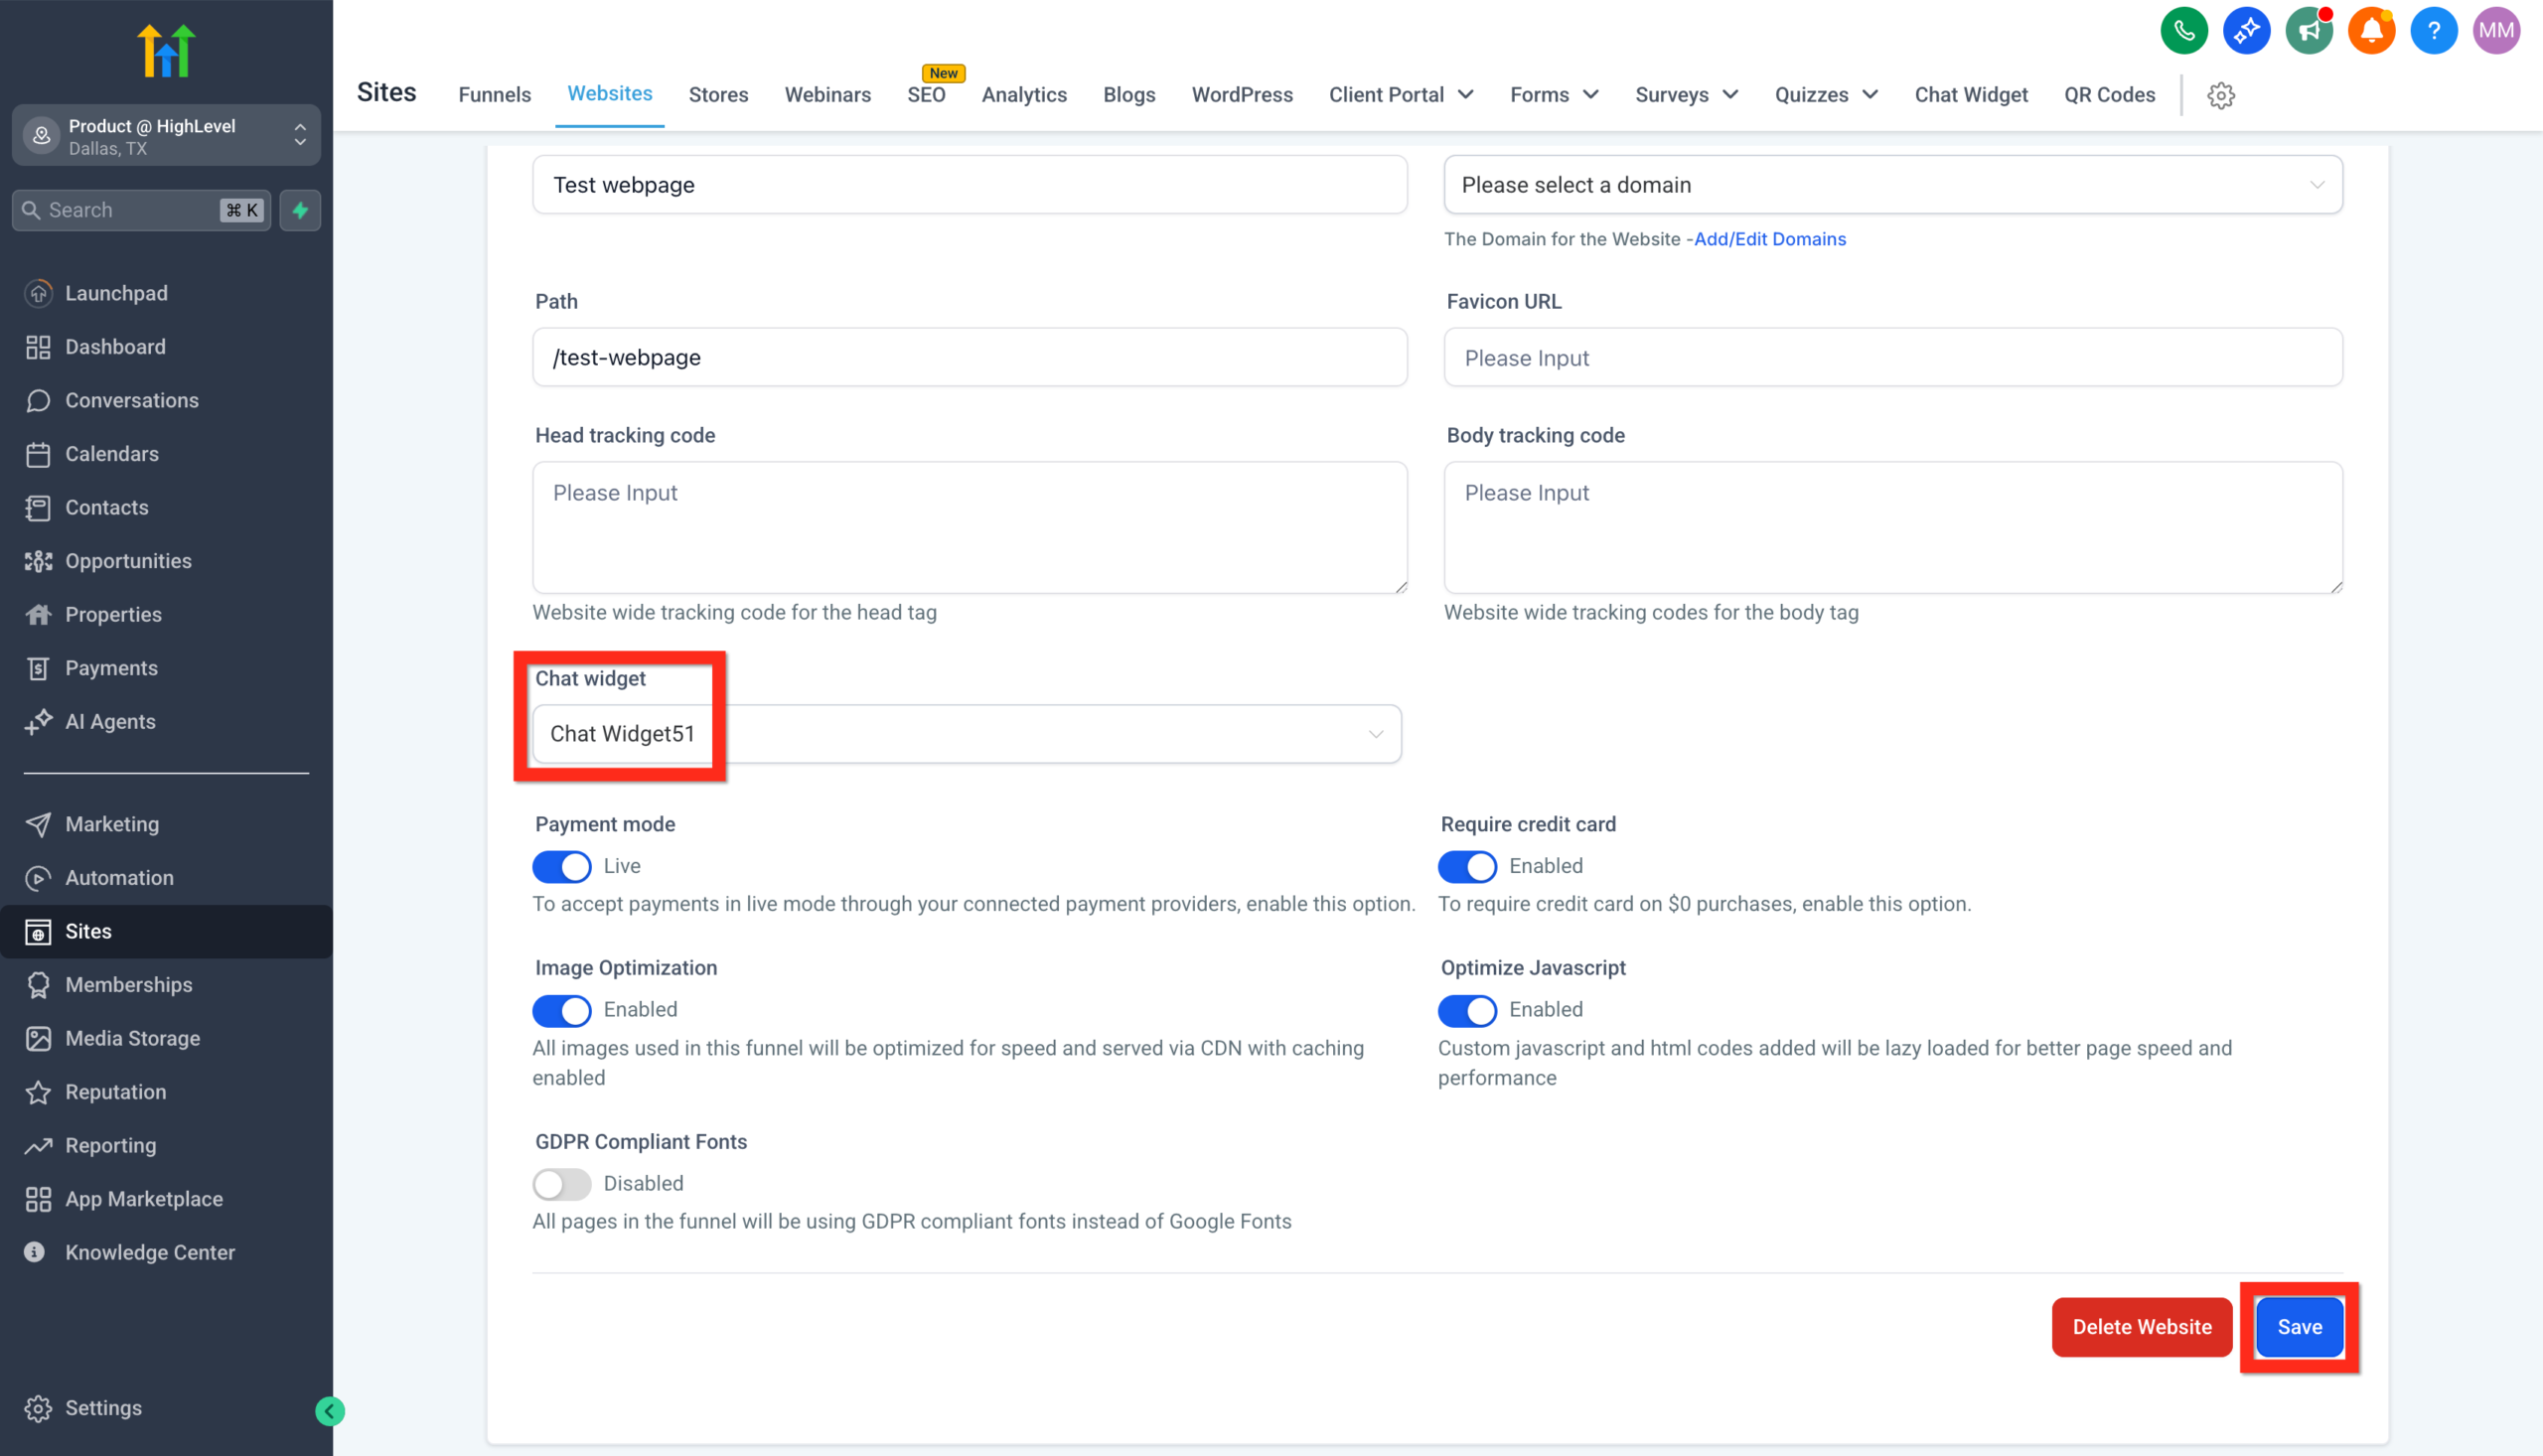
Step 2: Add the Chat Widget to Your Website or Funnel
Option A: GoHighLevel Websites and Funnels
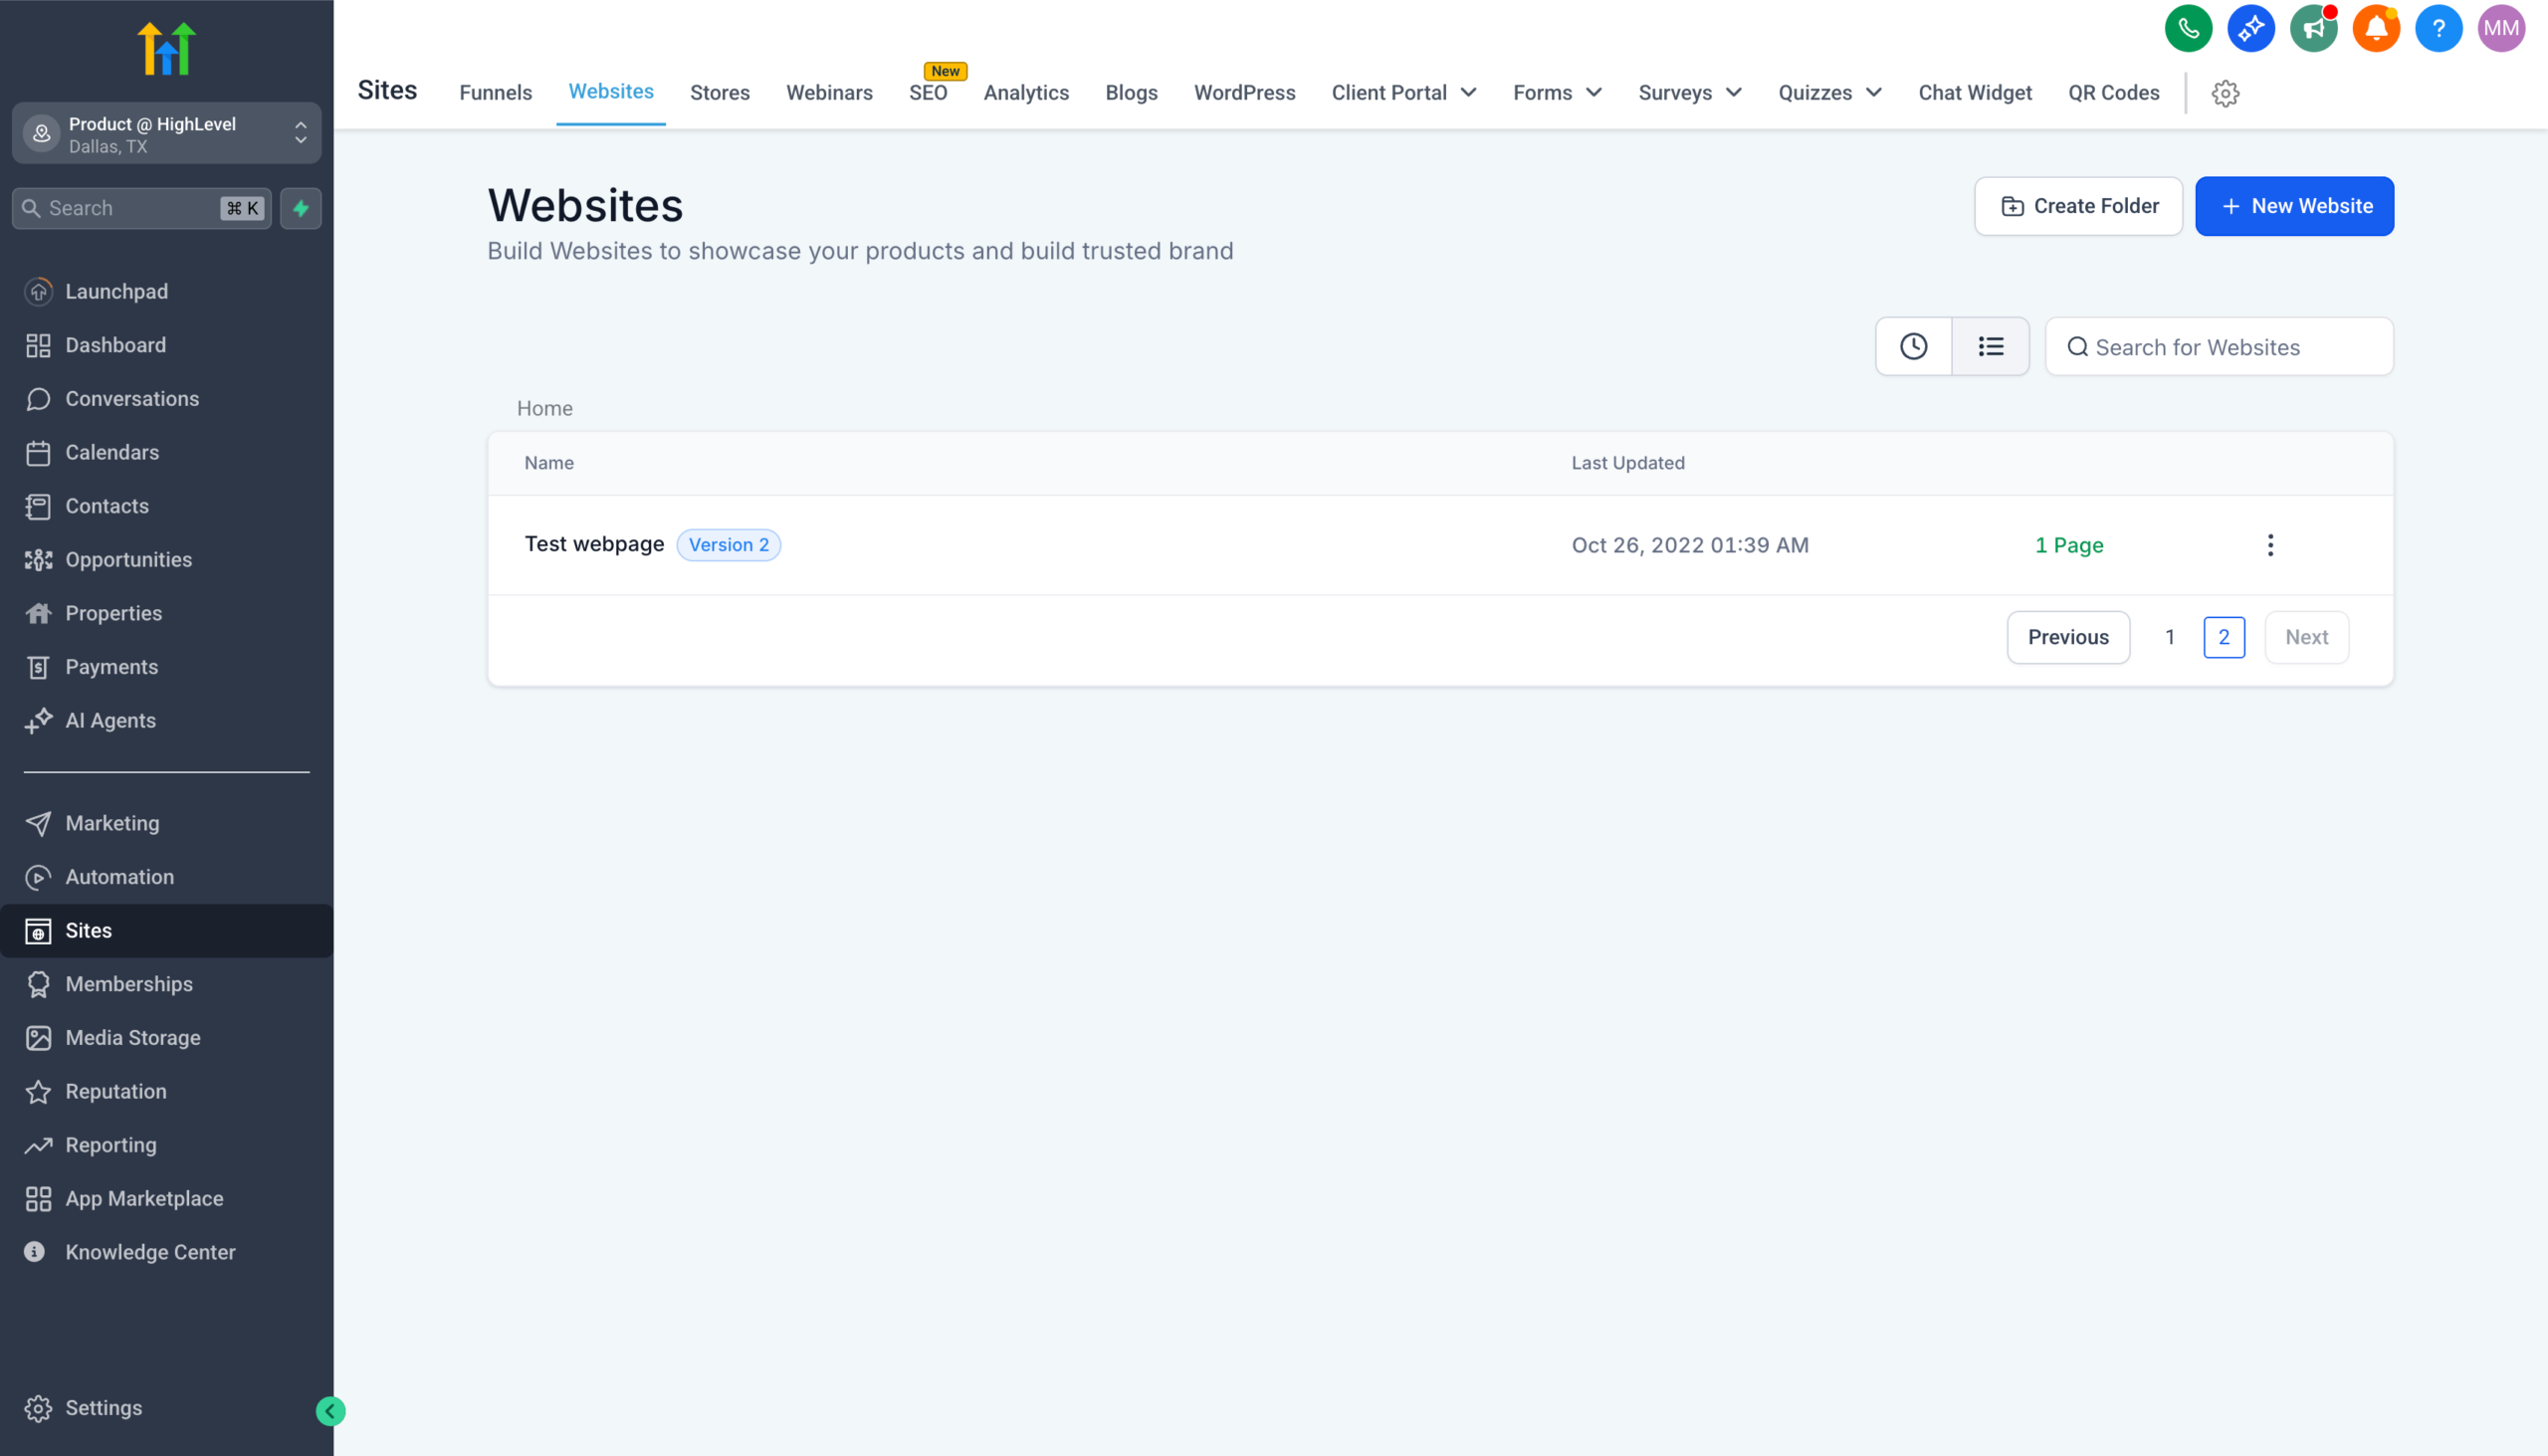
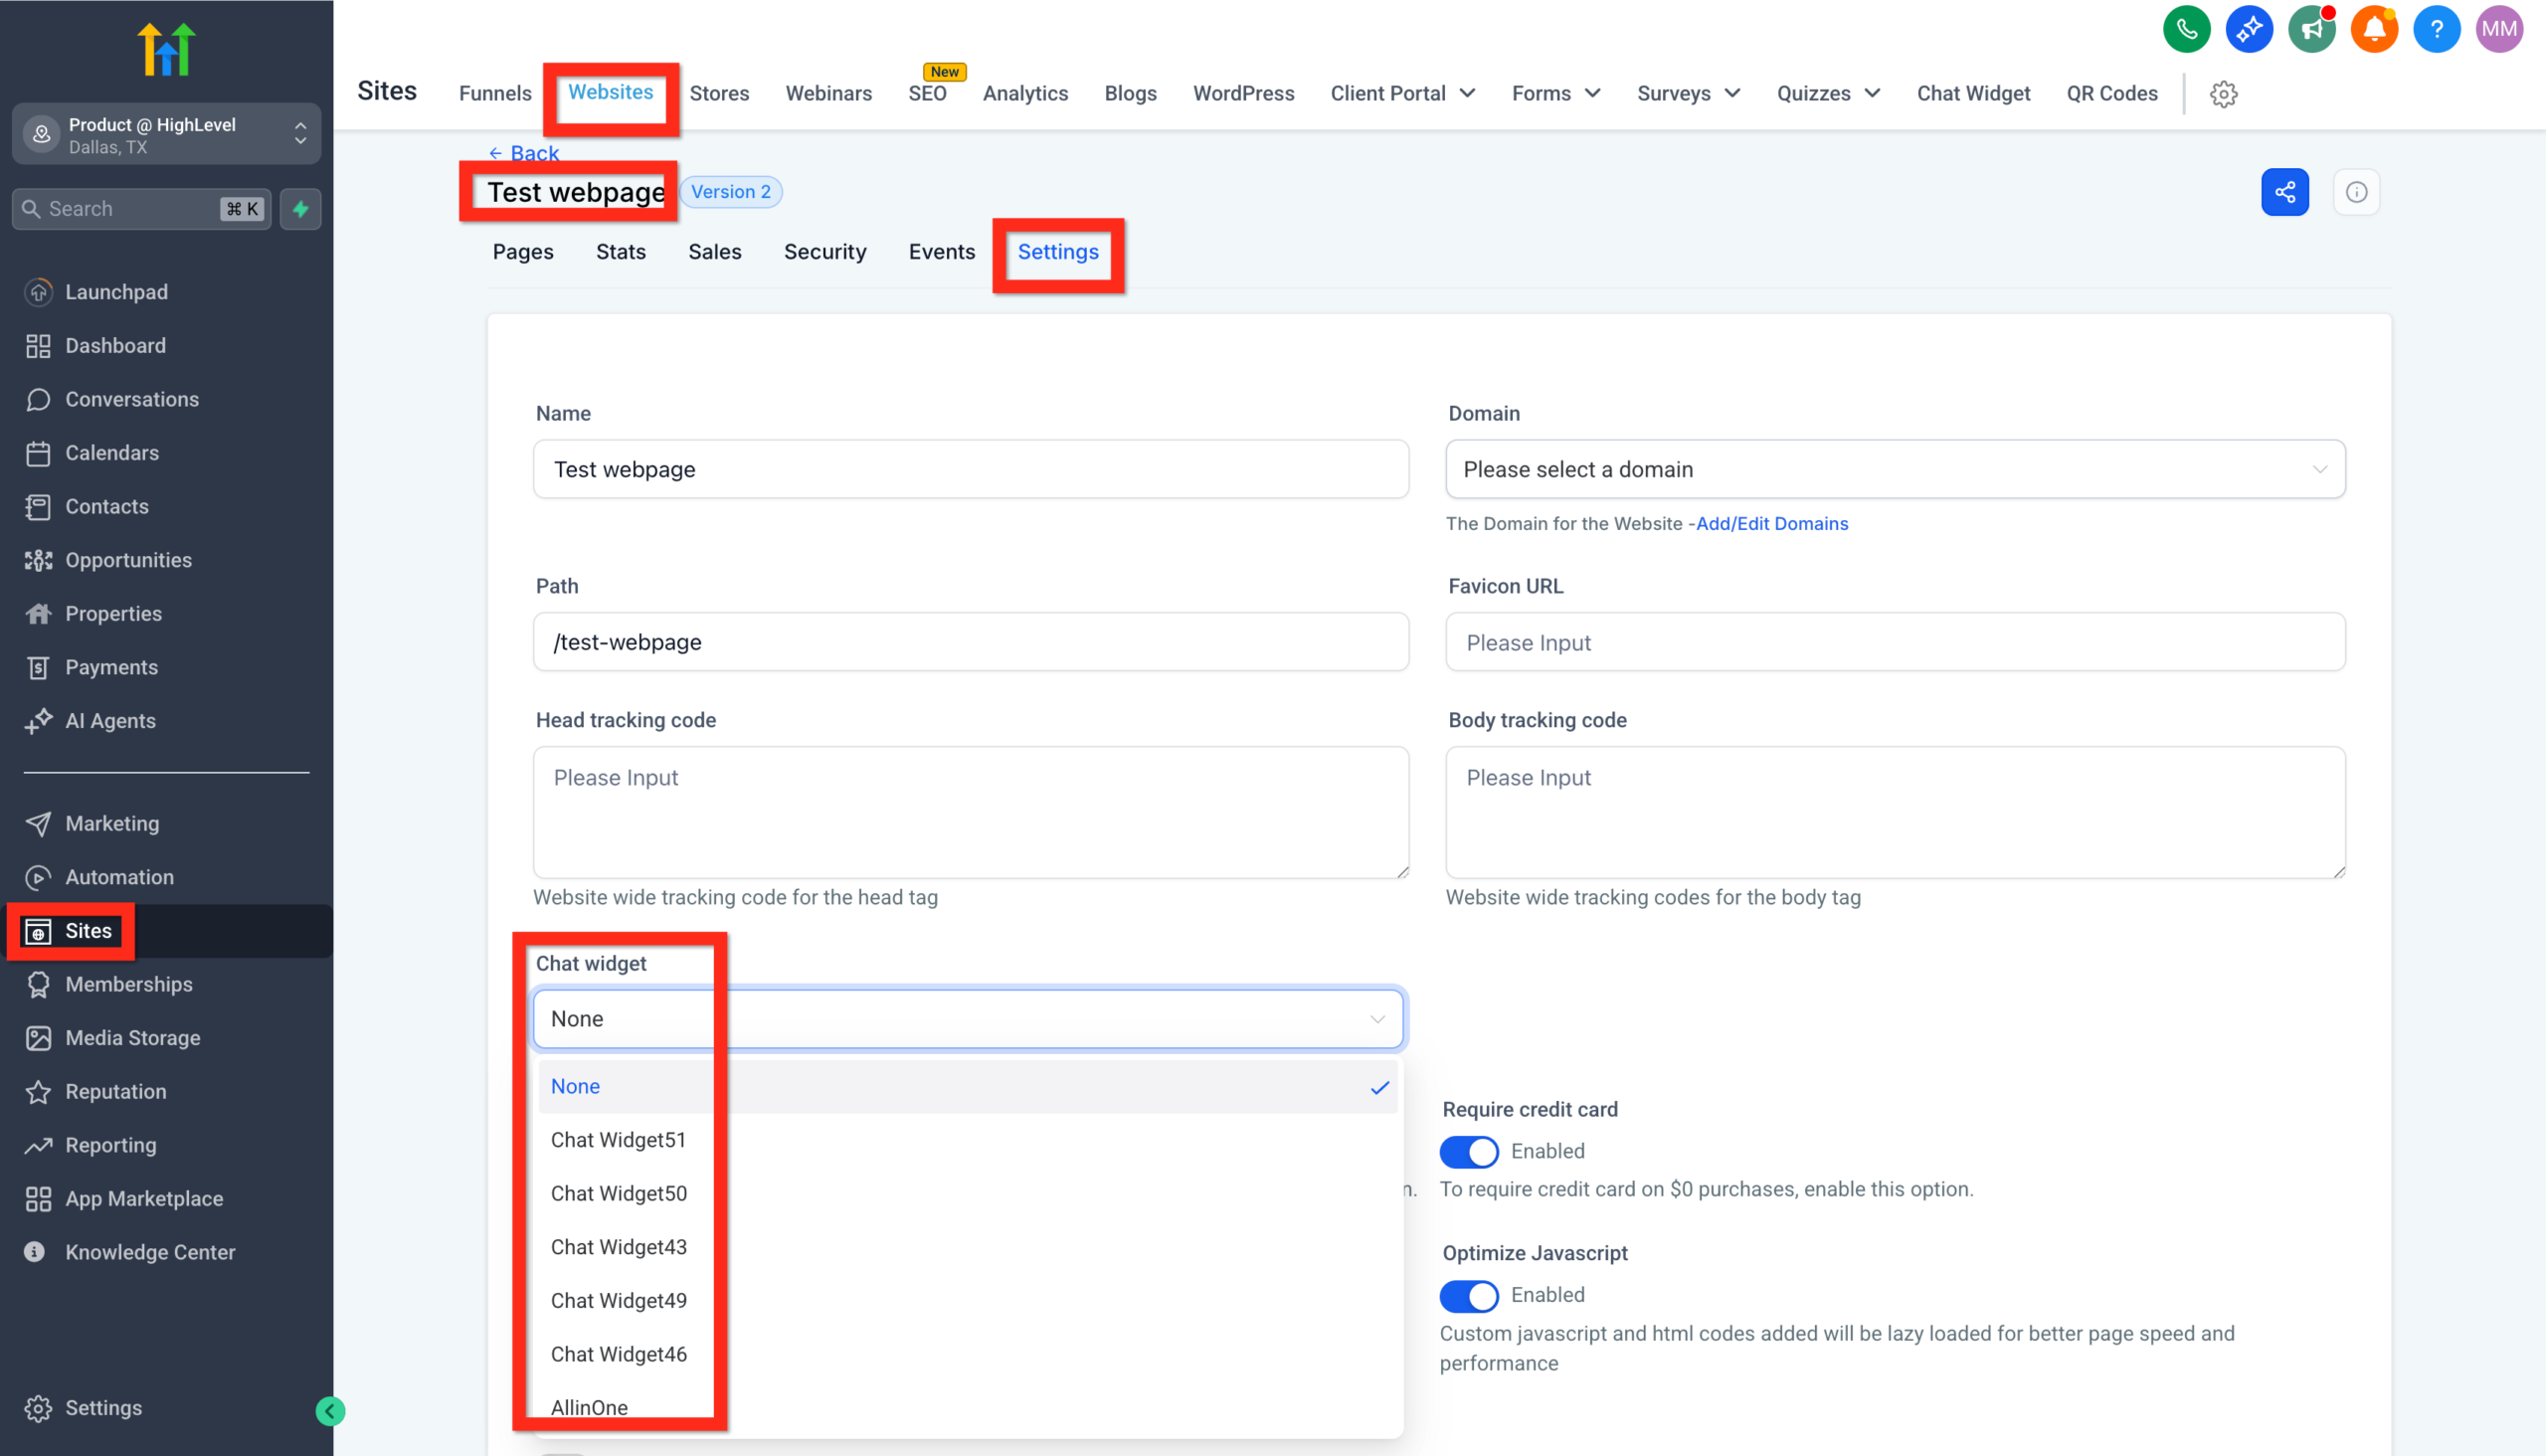
- In GoHighLevel, go to Sites > Websites or Sites > Funnels.
- Open the specific website or funnel where you want live chat to appear.
- Launch the page editor.
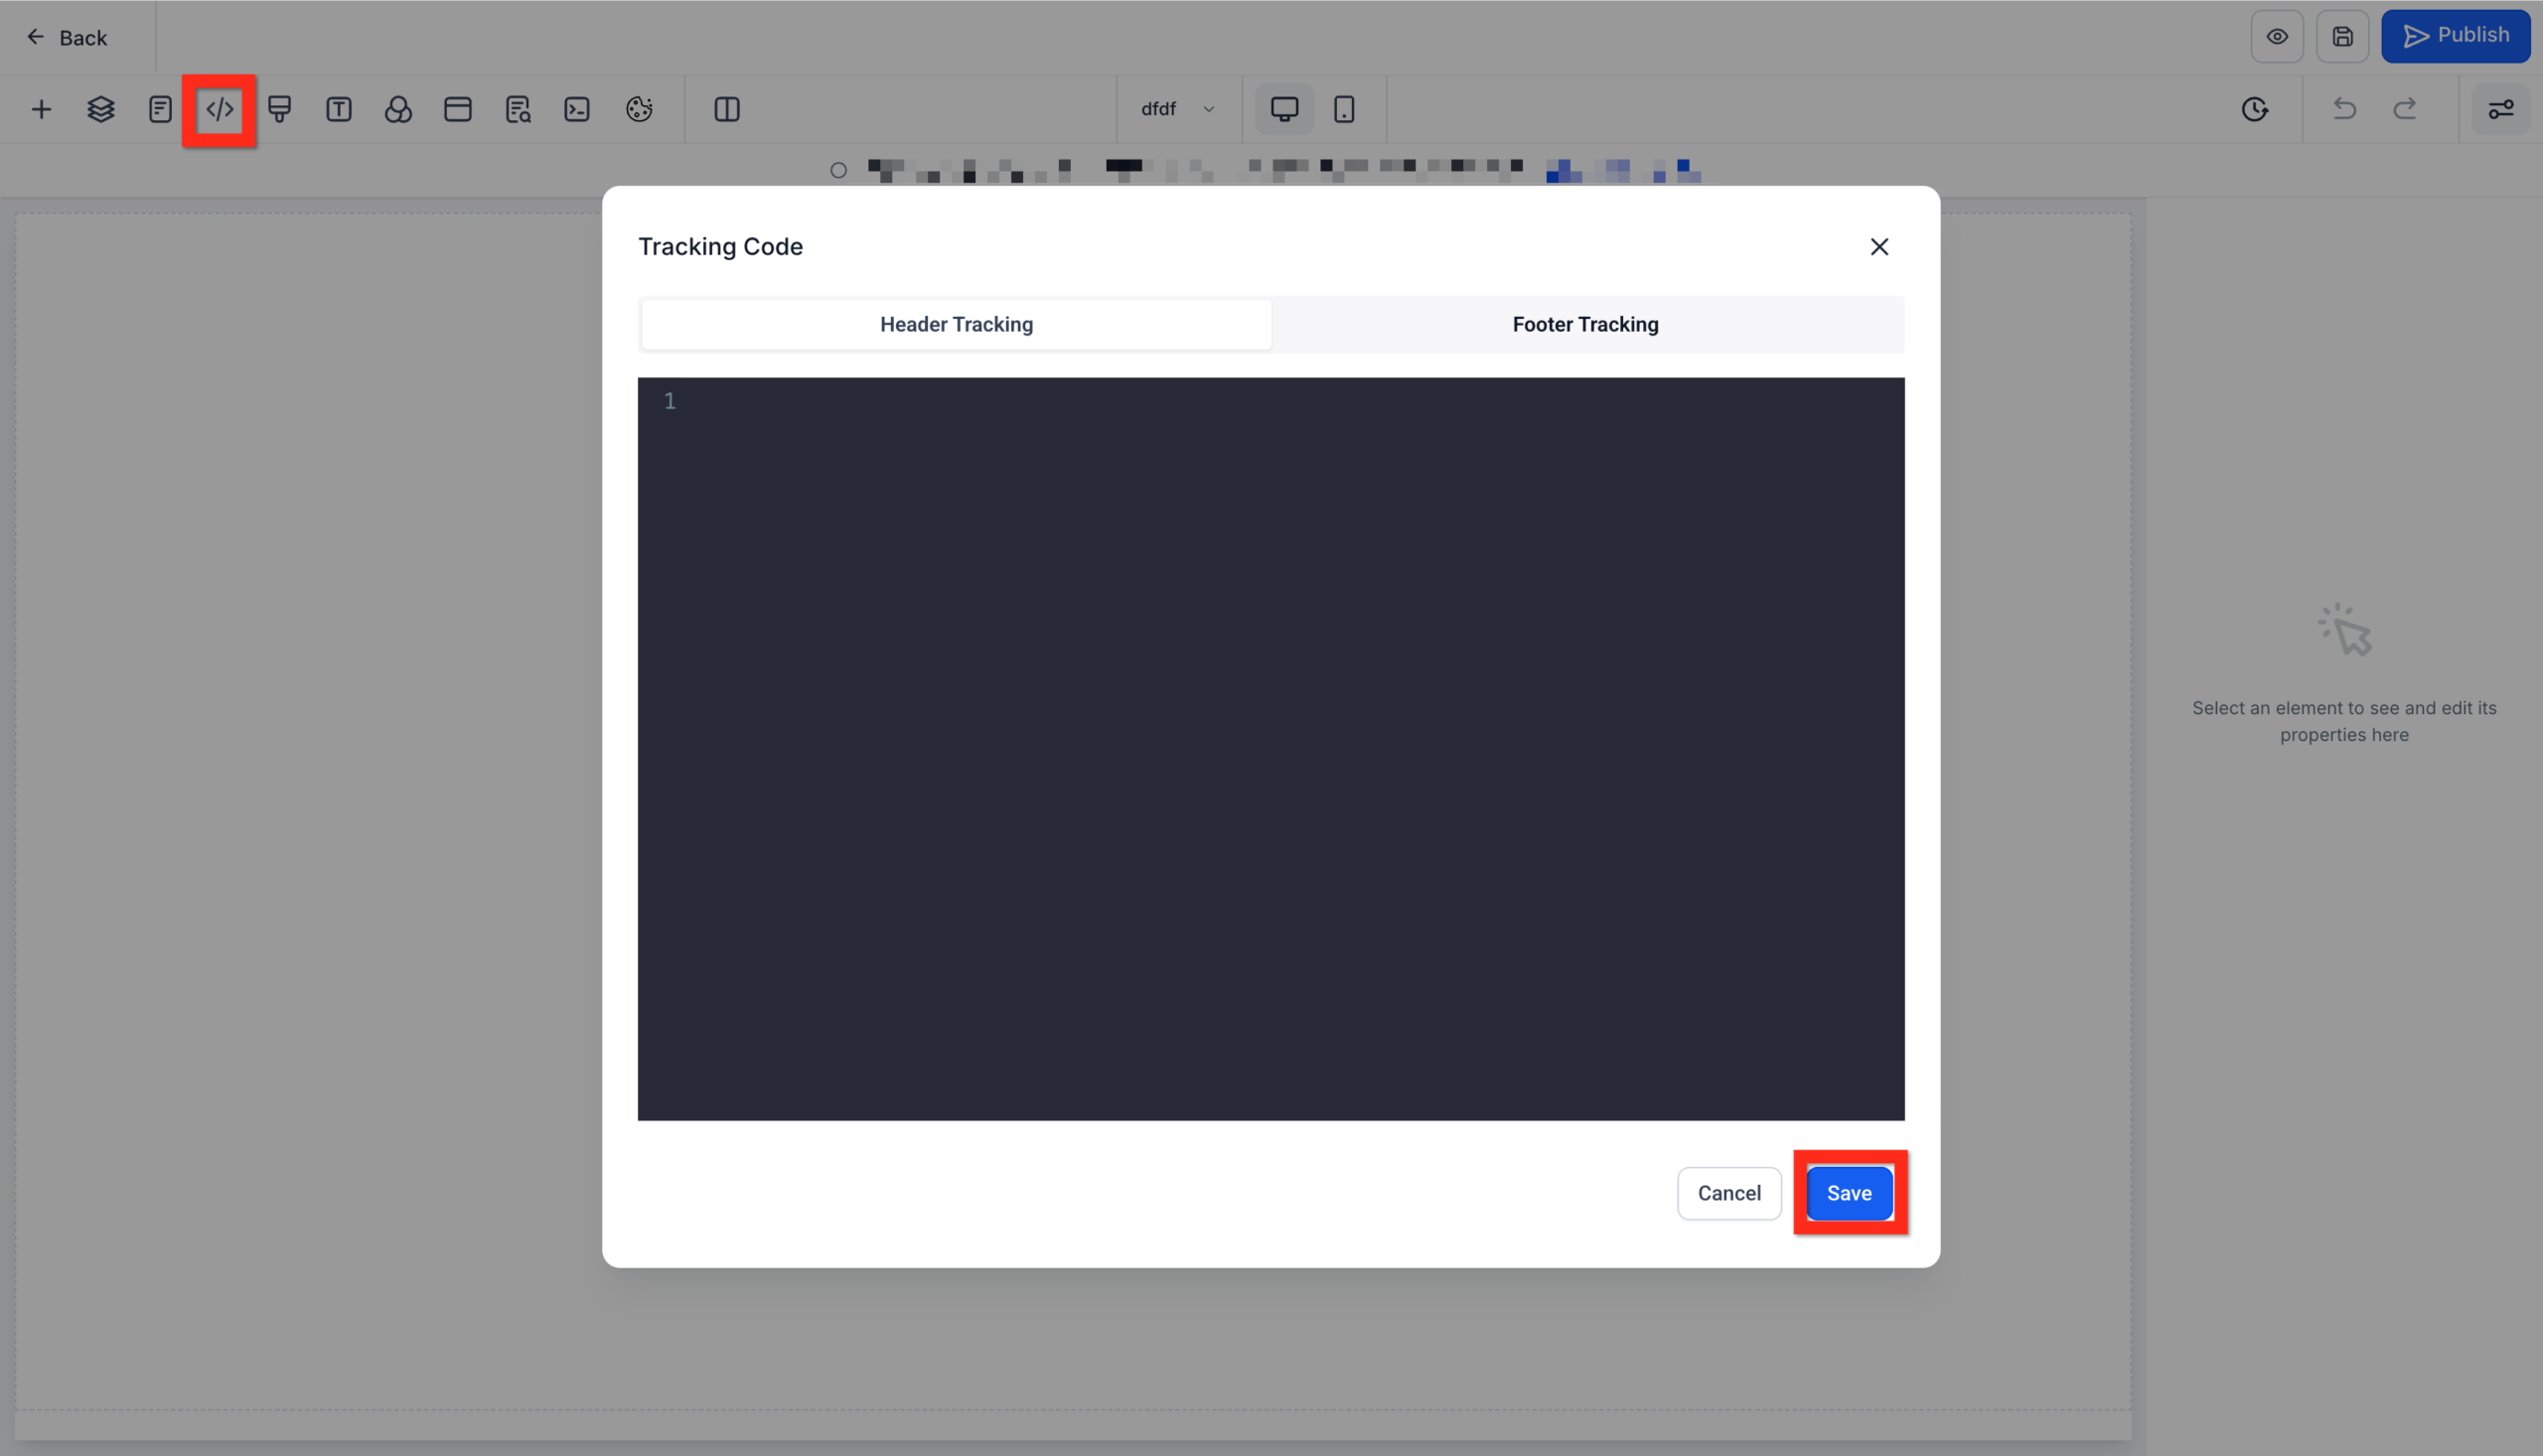
- Click the Tracking Code icon (often shown as
). - Paste the chat widget embed code into the appropriate box (usually the footer or body tracking section).
- Save and publish your changes.
Once published, visit the page in a new browser tab. You should see the live chat widget appear in the corner you configured.
Option B: External Websites (WordPress, Shopify, etc.)
- Log in to your website platform (for example, WordPress or Shopify).
- Locate the section where you can add global header or footer scripts (for example, Appearance > Theme File Editor, a header/footer plugin, or a theme settings panel).
- Paste the GoHighLevel chat widget code into the footer or body section so it loads on every page where you want chat to appear.
- Save and publish the changes.
- Clear any caches or CDN layers if you use them, then open your site in an incognito window to confirm the widget shows correctly.
Step 3: Configure Notifications and Automations

Installing the widget is only half the job. To make sure your team actually responds, configure notifications and workflows.
Set Up Internal Notifications
- Go to Automations > Workflows in GoHighLevel.
- Create a new workflow and choose the trigger Customer Replied.
- Add a filter so the Reply Channel equals Chat Widget.
- Add an action to send an internal notification (email, SMS, or in-app) to the people who should respond.
- Optionally, add a create task action so chats that are not resolved become trackable to-dos.
Route and Assign Conversations Automatically
- Use Assign to User actions to send chats to the right owner (for example, sales on weekdays, support on weekends).
- Tag contacts based on which page they chatted from so you know their context when you follow up.
- Add contacts to specific pipelines or opportunities if the chat indicates buying intent.
Step 4: Customize the Experience
A polished chat experience increases trust and response rates. Inside the chat widget settings, make sure you:
- Match colours, fonts, and logo to your website branding.
- Write a clear welcome message that sets expectations (for example, “Ask us anything about pricing or timelines and we will reply in a few minutes.”).
- Configure availability hours or away messaging so visitors know when to expect a response.
- Decide what information to collect up front (name, email, phone) so every chat becomes a usable lead.
Step 5: Test and Optimize Your Widget
- Open your website on desktop and mobile, start a test chat, and confirm messages appear in Conversations in GoHighLevel.
- Reply from the GoHighLevel inbox to ensure visitors see responses and that notifications fire correctly.
- Measure how many chats turn into leads or opportunities and adjust your questions, routing, and follow-up workflows accordingly.
Troubleshooting Common Live Chat Widget Issues
The widget is not showing on my site
- Confirm the embed code is present on the page and has not been altered.
- Make sure you published the latest version of your page or funnel.
- Check for ad blockers or script blockers in your browser; test in an incognito window.
- If using an external CMS, ensure the script is placed in a global header/footer or on the specific pages you are testing.
Chats are not appearing in GoHighLevel
- Verify you are in the correct sub-account where the widget was created.
- Double-check any workflow filters to ensure chats are not being excluded.
- Test again using a different browser or device to rule out local issues.
The team is missing messages
- Confirm internal notifications are enabled in your workflows.
- Make sure the GoHighLevel mobile app is installed and logged in for on-the-go responses.
- Define a clear process for who owns chats at different times of day so nothing slips through.
How THEMIG Turns Live Chat Into an Automated Revenue Channel
THEMIG is an automation and efficiency agency that builds AI-powered workflows for small and medium businesses. Instead of treating live chat as a simple support tool, we design it as the front door to your revenue engine.
Using GoHighLevel, we help you:
- Qualify visitors automatically with smart questions and forms.
- Route high-intent chats straight to the right salesperson or closer.
- Trigger personalized follow-up sequences across SMS, email, and voice drops.
- Push qualified conversations into your pipelines, with tasks and reminders so nobody is forgotten.
- Build dashboards that show exactly how many leads and deals start from live chat.
Try GoHighLevel with a 30-Day Free Trial
If you are not using GoHighLevel yet, you can test everything in this guide without risk.
Start your 30-day free trial of GoHighLevel and set up the live chat widget on your site. Pair it with well-designed workflows and you will have a always-on channel that captures leads, books appointments, and feeds your sales pipeline on autopilot.
When you are ready to go further, THEMIG can help you design the automation strategy, workflows, and reporting that turn those chats into scalable revenue.
Leave a Reply